


Marionberry Newborn Cardigan
A super stretchy newborn cardigan that will keep your little one warm without restricting their movement.
Disclaimer: This post may contain affiliate links. If you click one, we may receive a small commission at no cost to you. Thank you.
Full transparency: I had hoped to publish this pattern before the baby was born. But here I am, with a 1-month-old baby sleeping in the next room, finally ready to share it with the knitting world. Better late than never, I guess!
So let’s get to the point, because I have about half an hour before my little one will be hungry again.
The Marionberry Newborn Cardigan has a very forgiving fit thanks to it’s raglan construction and use of the ultra-stretchy brioche stitch. That means it won’t restrict your little one’s movements, and it will stretch to accommodate their growing body. Also, you only need one set of knitting needles for this project! No need to change needle size between the ribbing and the rest of the cardigan.
What you’ll need:
- Size 3.0mm (US size 2.5) circular knitting needles
- 2 skeins of fingering weight yarn in whatever colors you choose. The cardigan in the photos used:
- 1 skein Hobbii Unicorn Solid yarn in Cream (01)
- 1 skein Woolen Women Fibers yarn in colorway Rodeo and Romance
- Stitch markers (the safety pin type)
- 3 Stitch holders or scrap yarn
- Five buttons (12.5-15mm)
- Darning needle for seaming and attaching buttons
- Thread for attaching buttons
Abbreviations:
- CO: Cast on (we used the classic long-tail cast on).
- k: knit.
- p: purl.
- YO: yarn over.
- sl1yo: slip 1 stitch with yarn in front of work, then move yarn OVER needle to back of work. This creates a yarnover on top of the slipped stitch.
- brk: The next stitch should have a yarnover laying on top of it. Knit the stitch together with the yarnover.
- brp: The next stitch should have a yarnover laying on top of it. Purl the stitch together with the yarnover.
- k3tog: knit 3 stitches together.
- m1: make 1 stitch using whichever method you prefer.
Gauge:
- 19 stitches = 10cm (4in) in brioche stitch on 3mm needles.
Sizes:
- This pattern is available in two sizes: newborn (0-1 mos) and 1-3 mos.
- The stitch counts are shown as follows in the pattern: newborn [1-3]
Notes:
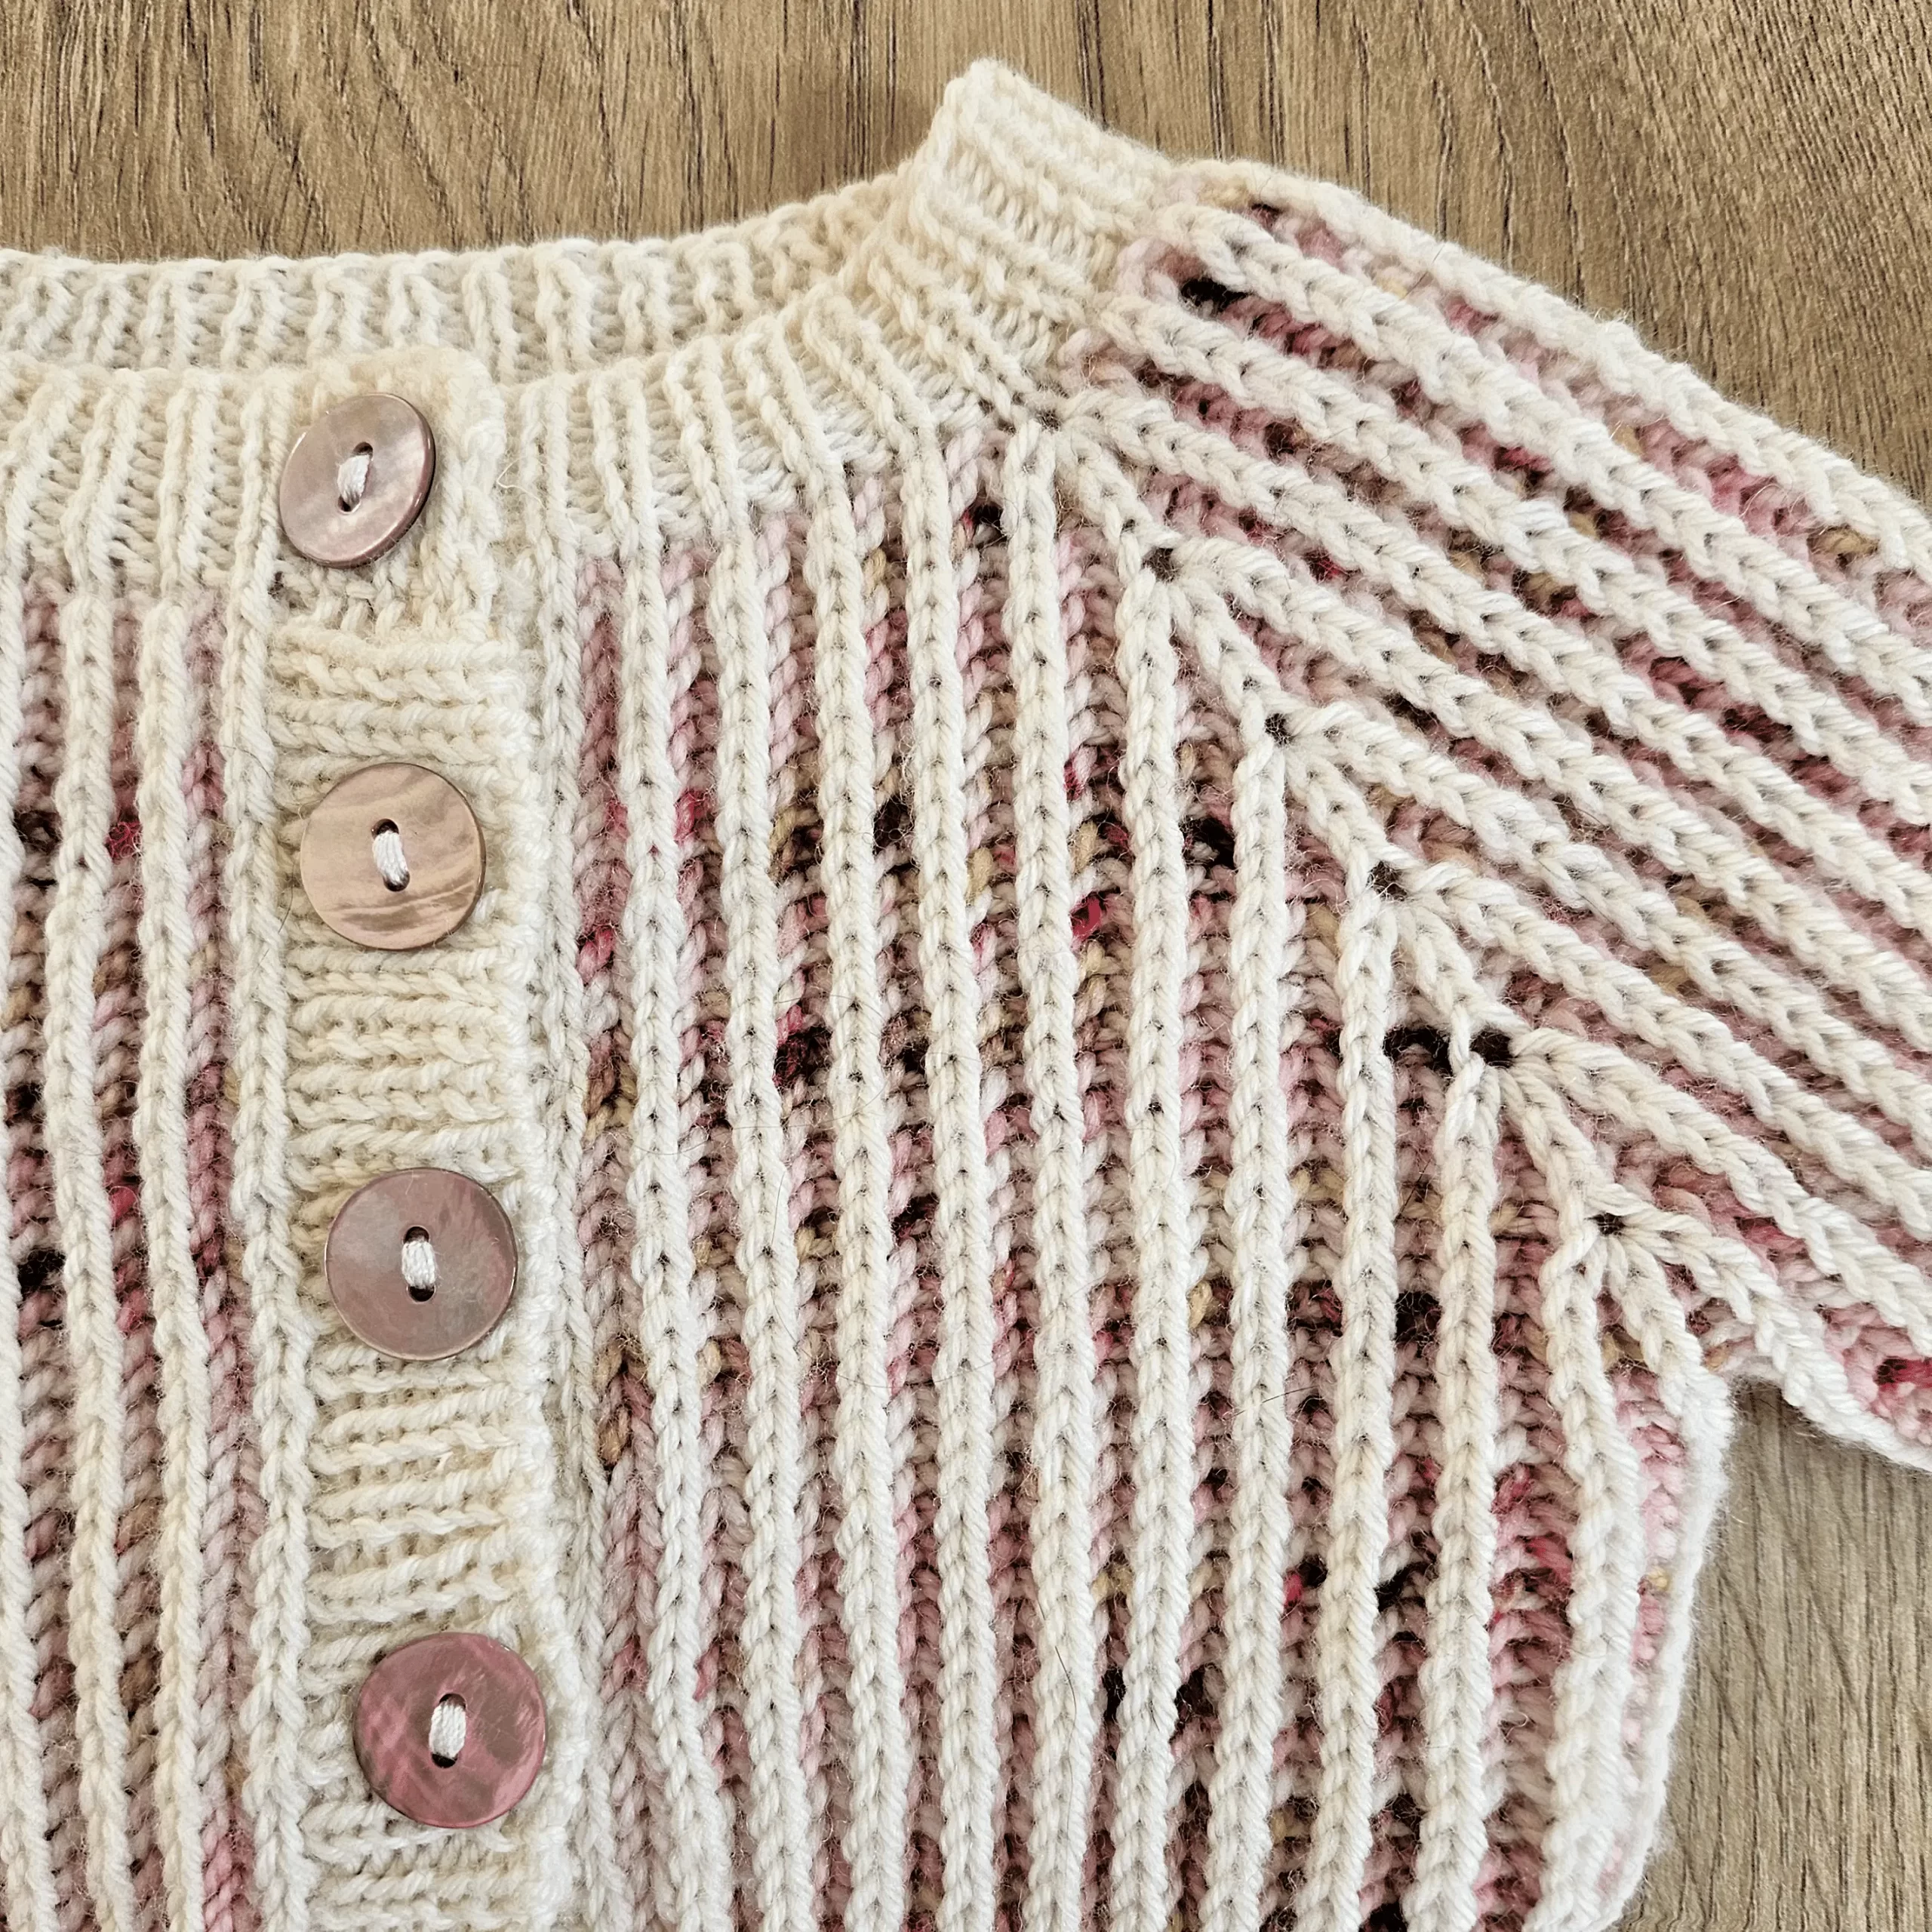
- Before beginning, decide which yarn you’ll use for the ribbing color, the color of the knit stitch columns (color A), and the background color (color B). For example in the white & pink cardigan in the photos:
- The ribbing and color A are white.
- color B is the pink speckled yarn.
- Don’t forget to knit a swatch in brioche stitch and block it! The brioch stitch stretches a lot when blocked, so your cardigan might seem very small while knitting. Trust the process (and your gauge), it will stretch out.
- Because this pattern is quite stretchy, the newborn size will fit most average size babies. Size up if you’re expecting a large baby.
Instructions
Collar
With the ribbing color, cast on 85 [85] stitches.
Row 1 (rs): k1, *k1, p1, repeat from * until 2 stitches remain, k2.
Row 2 (ws): k1, *p1, k1, repeat from * to end of row.
Row 3: repeat row 1.
Row 4: repeat row 2.
Row 5: repeat row 1 until 6 stitches remain, bind off 2 stitches, then finish the row as usual.
Row 6: k1, p1, k1, p1, cast on 2 stitches, k1, *p1, k1, repeat from * to end of row.
Row 7: repeat row 1.
Row 8: repeat row 2.
Row 9: bind off first 6 stitches, then continue in ribbed pattern to end of row — 79 [79] stitches remaining.
Row 10: bind off first 6 stitches, purl to end of row — 73 [73] stitches remaining.
Yoke
Place raglan markers:
Start at the edge of your work and count the stitches, placing markers on the following stitches: 12th stitch, 24th stitch, 50th stitch, 62nd stitch
Slide your stitches to the other side of the needles, so you can begin working the yoke on the wrong size. Attach a strand of color B yarn.
Row 1 (color B, ws): k1, *sl1yo, k1, repeat from * to end of row.
Row 2 (color A, rs, raglan increase row): k1, *brk, sl1yo, repeat from * until 2 stitches remain, brk, k1. AT THE SAME TIME, work each marked stitch as follows: knit as if to brk but don’t slip the stitch off the lefthand needle, YO, brk again leaving the stitch on the lefthand needle, YO, brk. 4 stitches increased at each marker — 89 [89] stitches total.
Slide project to the other side of the needles.
Row 3 (color B, rs): p1, *sl1yo, brp, repeat from * until 2 stitches remain, sl1yo, p1. For the stitches created in the previous row, the brps will be worked as simple purls (because they don’t yet have YOs laying on top of them).
Row 4 (color A, ws): p1, *brp, sl1yo, repeat from * until 2 stitches remain, brp, p1.
Slide project to the other side of the needles.
Row 5 (color B, ws): k1, *sl1yo, brk, repeat from * until 2 stitches remain, sl1yo, k1.
Row 6 (color A, rs): k1, *brk, sl1yo, repeat from * until 2 stitches remain, brk, k1.
Slide project to the other side of the needles.
Row 7 (color B, rs): p1, *sl1yo, brp, repeat from * until 2 stitches remain, sl1yo, p1.
Row 8: Repeat row 4.
Slide project to the other side of the needles.
Row 9: Repeat row 5.
Repeat rows 2-9 five [six] times more — 169 [185] stitches total
Right sleeve
Cut both strands of working yarn, leaving tails for weaving in. Then separate the stitches as follows:
Size newborn: place the first 24 stitches on a stitch holder, slip the next 36 stitches, then place the remaining 109 stitches on another stitch holder.
Size 1-3 mos: place the first 26 stitches on a stitch holder, slip the next 40 stitches, then place the remaining 119 stitches on another stitch holder.
Slide sleeve stitches so you are starting on the rs, and attach a new strand of color A yarn.
Sleeve row 1 (color A, rs): cast on 2 stitches, *sl1yo, brk, repeat from * to end of row, then cast on 1 more stitch.
Slide project to the other side of the needles.
Sleeve row 2 (color B, rs): p1, sl1yo, p1, *sl1yo, brp, repeat from * until 2 stitches remain, sl1yo, p1.
Sleeve row 3 (color A, ws): p1, *brp, sl1yo, repeat from * until 2 stitches remain, brp, p1.
Slide project to the other side of the needles.
Sleeve row 4 (color B, ws): k1, *sl1yo, brk, repeat from * until 2 stitches remain, sl1yo, k1.
Sleeve row 5 (color A, rs): k1, *brk, sl1yo, repeat from * until 2 stitches remain, brk, k1.
Slide project to the other side of the needles.
Sleeve row 6 (color B, rs): p1, *sl1yo, brp, repeat from * until 2 stitches remain, sl1yo, p1.
Knit 14 more rows of brioche stitch (repeating sleeve rows 3-6), then perform a decrease row as follows:
Decrease row (color A, rs): k1, k3tog, sl1yo, *brk, sl1yo, repeat from * until 4 stitches remain, k3tog, k1 (4 stitches decreased)
Knit 15 [19] more rows of brioche stitch, then repeat the decrease row again.
Knit 13 [13] more rows in brioche stitch.
Transition row (ribbing color, ws): k1, m1, brp, *k1, brp, repeat from * to last stitch, m1, k1
Work in 1×1 rib for 8 [10] rows, then use a stretchy bind off to bind off all stitches.
Left sleeve
Redistribute remaining stitches as follows:
Right front: 24 [26] stitches on stitch holder
Right sleeve: finished
Back: 49 [53] stitches on stitch holder
Left sleeve: 36 [40] stitches on needles
Left front: 24 [26] stitches on stitch holder
Slide the sleeve stitches so you are starting on the rs, and attach a new strand of color A yarn.
Sleeve row 1 (color A, rs): cast on 1 stitch, *brk, sl1yo, repeat from * to end of row, then cast on 2 more stitches.
Slide project to the other side of the needles.
Sleeve row 2 (color B, rs): p1, *sl1yo, brp, repeat from * until 4 stitches remain, sl1yo, p1, sl1yo, p1.
From here, jump back to Row 3 of the Right Sleeve. Continue from row 3 to end of sleeve.
Body
Move all remaining stitches from holders back onto needles. You’ll start knitting with color A on the right side.
Setup row 1 (color A, rs): k1, *brk, sl1yo, repeat from * until 2 stitches remain, brk, k1. AT THE SAME TIME cast on 2 stitches in the gaps of each underarm (4 stitches added)
Slide project to the other side of the needles.
Setup row 2 (color B, rs): p1, *sl1yo, brp, repeat from * until 2 stitches remain, sl1yo, p1. FOR THE NEW STITCHES in the underarm, you’ll work the brps as regular purls.
Row 1 (color A, ws): p1, *brp, sl1yo, repeat from * until 2 stitches remain, brp, p1.
Slide project to the other side of the needles.
Row 2 (color B, ws): k1, *sl1yo, brk, repeat from * until 2 stitches remain, sl1yo, k1.
Row 3 (color A, rs): k1, *brk, sl1yo, repeat from * until 2 stitches remain, brk, k1.
Slide project to the other side of the needles.
Row 4 (color B, rs): p1, *sl1yo, brp, repeat from * until 2 stitches remain, sl1yo, p1.
Continue knitting in brioche stitch (rows 1-4) for 28 [36] rows
Hem row 1 (ribbing color, ws): purl across, increasing 4 stitches throughout the row. I recommend increasing 2 stitches under each armpit, so there’s no jog between the brioche and rib stitches when viewed from the front.
Hem row 2 (rs): k1, *k1, p1, repeat from * to last 2 stitches, k2
Hem row 3 (ws): k1, *p1, k1, repeat from * to end of row
Repeat hem rows 2 and 3 three [three] times more, then bind off all stitches using a stretchy bind off.
Button Band
Start on the righthand side of the cardigan (when worn, aka the one with the button hole already in the collar).
On the rs, pick up and knit 51 [59] stitches for the right buttonhole band.
Row 1 (ws): k1, *p1, k1, repeat from * to end of row
Row 2 (rs): k1, *k1, p1, repeat from * to last 2 stitches, k2
Row 3: repeat row 1
Row 4: continue in 1×1 ribbed stitch as in row 2, placing 5 [5] button holes throughout the band. To place a button hole, simply bind off two stitches.
Row 5: continue in 1×1 ribbed stitch as in row 1. Each time you reach a buttonhole, cast on two stitches to fill the gap.
Row 6: repeat row 2
Row 7: repeat row 1
Row 8: repeat row 2
Bind off all stitches using a stretchy bindoff.
Repeat this process on the left, without buttonholes. Sew on buttons to align with the holes on the right.
Finishing
Block the sweater, seam it up, and weave in any loose ends.
Want FREE knitting patterns?
Subscribers get FREE access to newly-released patterns.