
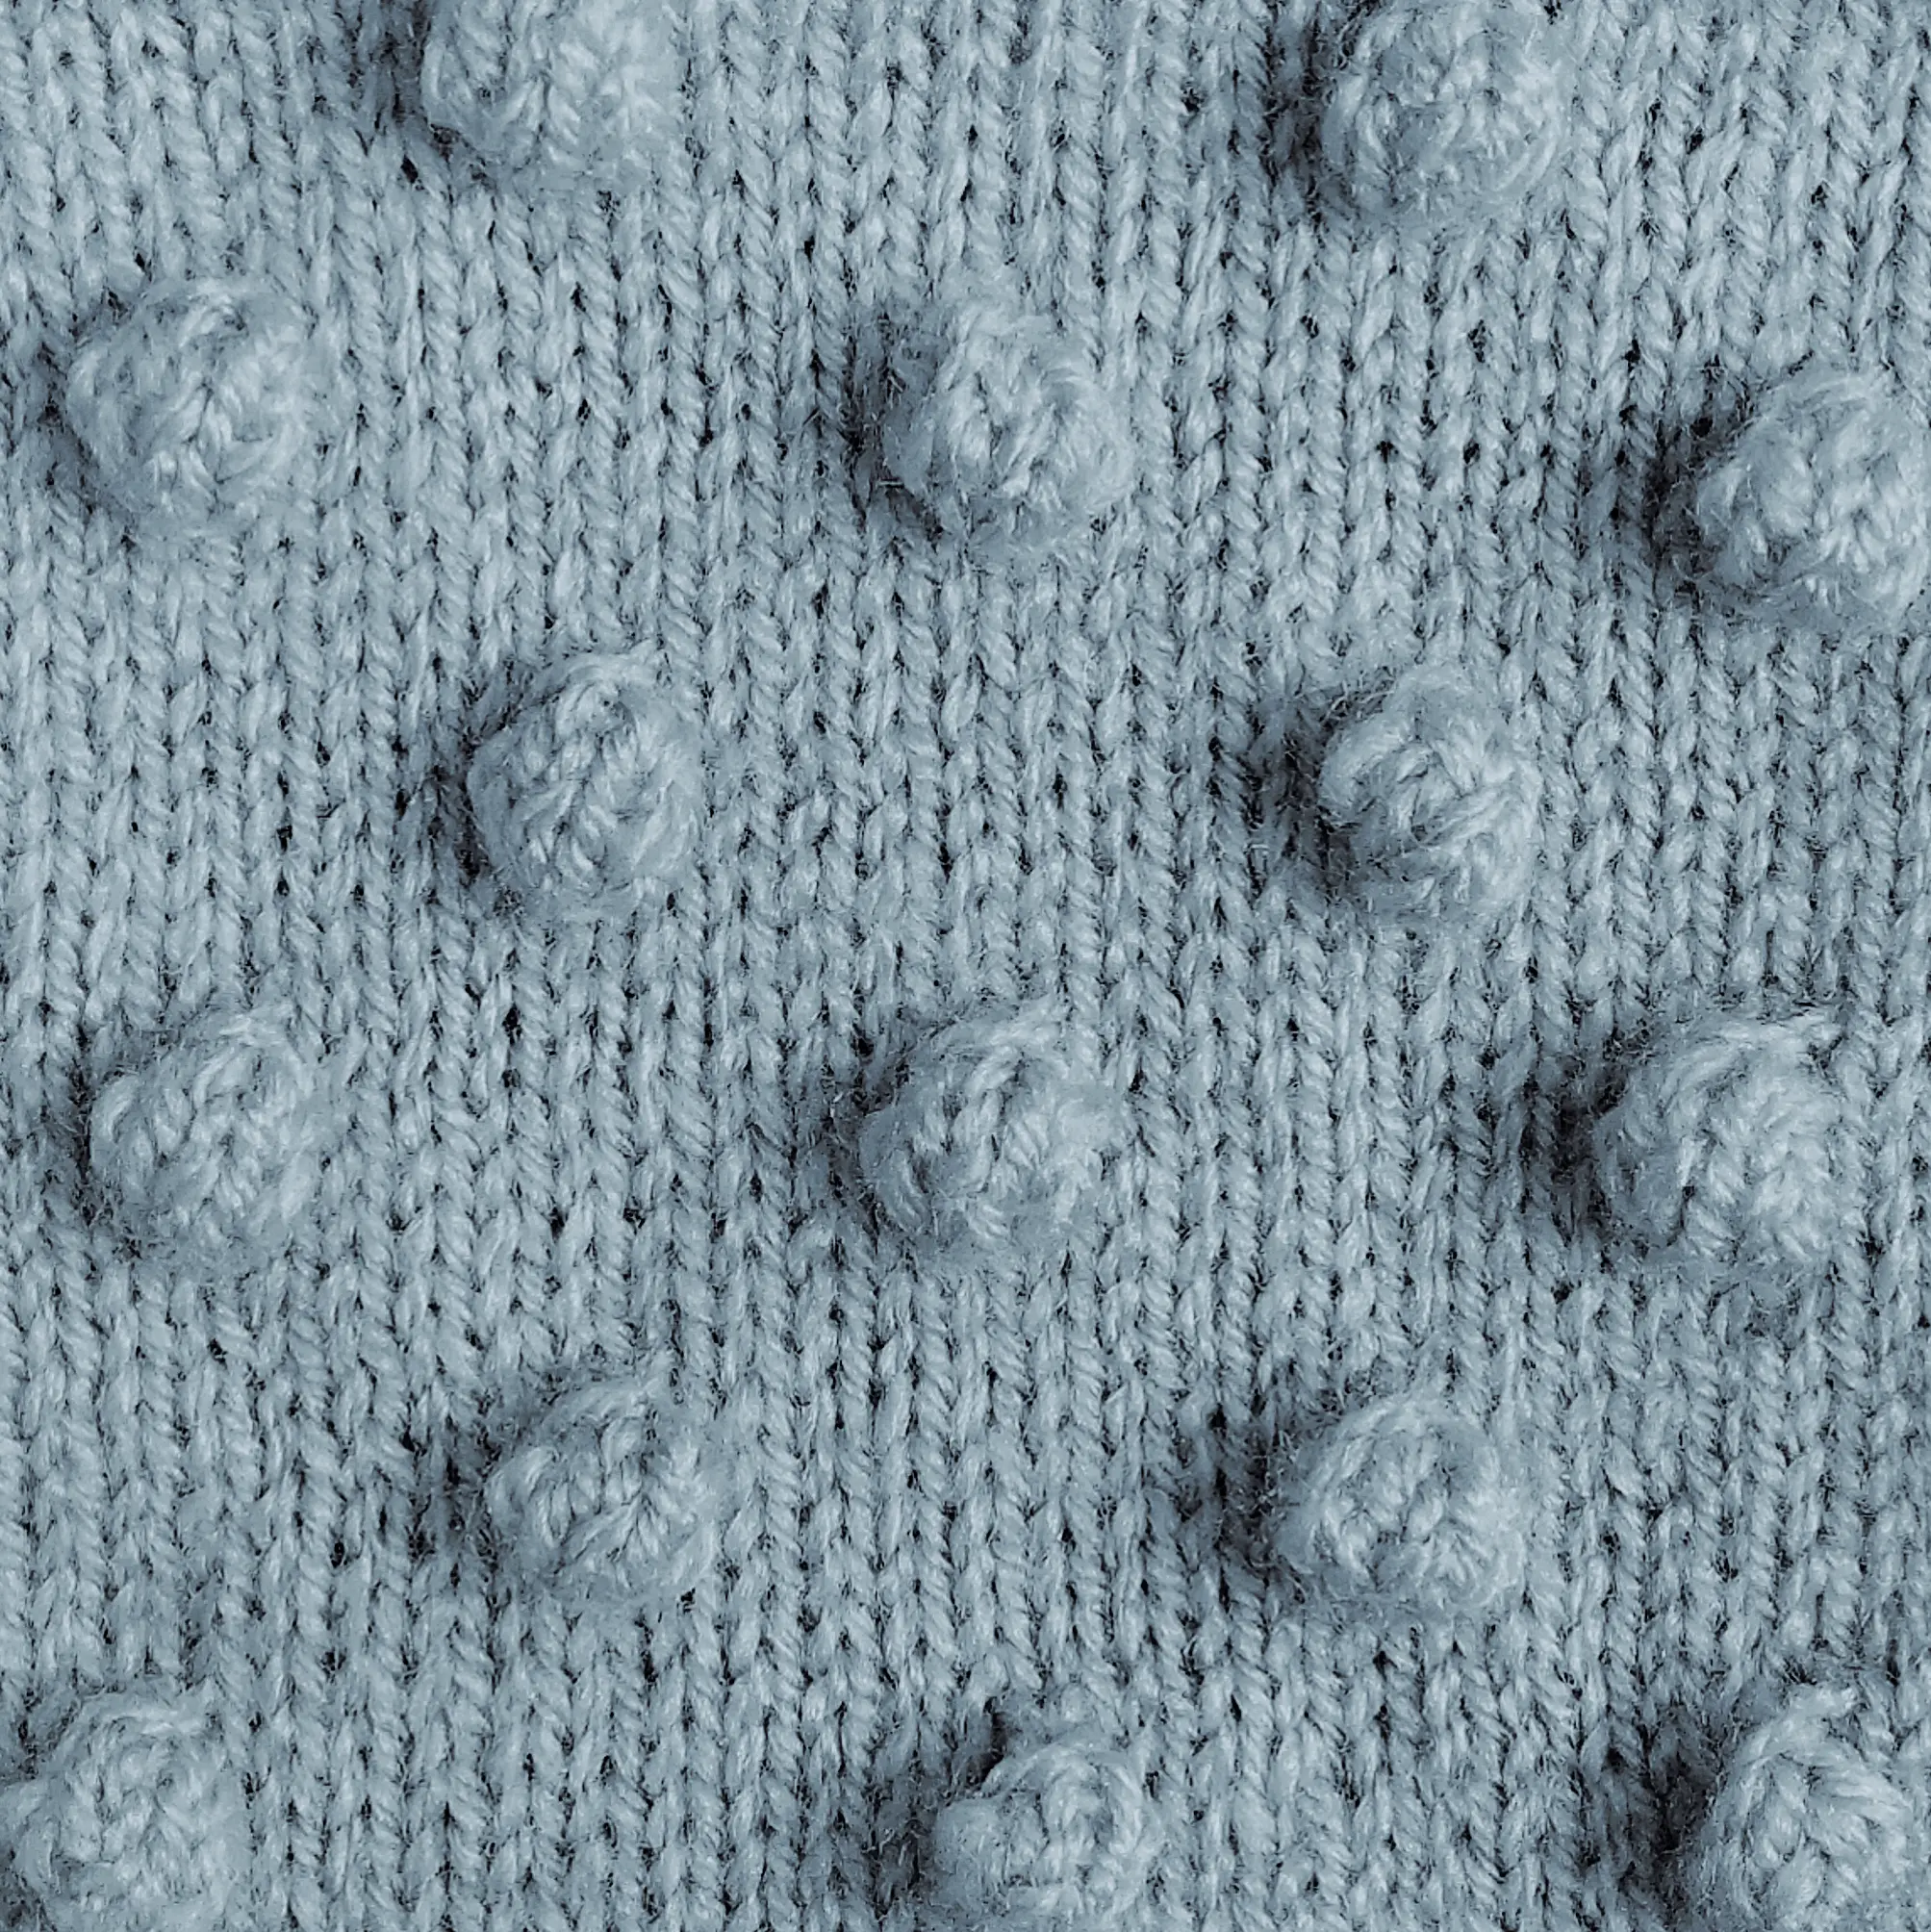
Bobbles
This basic bobble stitch adds a pop of texture to your knitting projects.
The instructions here makes a 4-stitch bobble, but you can easily adjust to make smaller bobbles with 3 stitches or larger bobbles with 5 stitches.
Disclaimer: This post may contain affiliate links. If you click one, we may receive a small commission at no cost to you. Thank you.
Pros of Bobble Stitch:
- Adds a pop of texture to your knitting projects
- Can be placed anywhere in your knitting projects, though it’s usually paired with Stockinette stitch
- Bobbles can easily be sized up or down by adjusting the number of stitches
Cons of Bobble Stitch:
- Requires frequent turning of your project, which can be tedious
- Feels very slow to knit
What you’ll need:
- Any yarn (we recommend worsted weight or smaller)
- Knitting needles corresponding to the size of your yarn
Abbreviations:
- kfbfb: Knit a single stitch through the front, then the back, front again, and back again. Creates 4 stitches out of 1.
- sl1: slip 1 stitch purlwise.
- turn: turn your project to switch direction, then work the next row on the other side.
- k2tog: knit the next two stitches together. 1 stitch decreased.
- p2tog: purl the next two stitches together. 1 stitch decreased.
Knitting Instructions for the Bobble Stitch:
Knit to the spot where you’d like to place a bobble, then follow the below instructions.
Row 1 (rs): kfbfb, turn (1 stitch increased to 4 stitches)
Row 2 (ws): sl1, p3, turn
Row 3: sl1, k3, turn
Row 4: sl1, p3, turn
Row 5: sl1, k3, turn
Row 6: p2tog, p2tog, turn (2 stitches decreased)
Row 7: k2tog (1 stitch decreased)
You’ve just completed your bobble. Use your finger to “pop” it out a little and then continue knitting.
The bobble may seem a little loose immediately after finishing. Don’t worry! Just continue knitting and the following row will help secure it into place.
Want FREE knitting patterns?
Subscribers get FREE access to newly-released patterns.
One Comment