One More Mistake Beanie
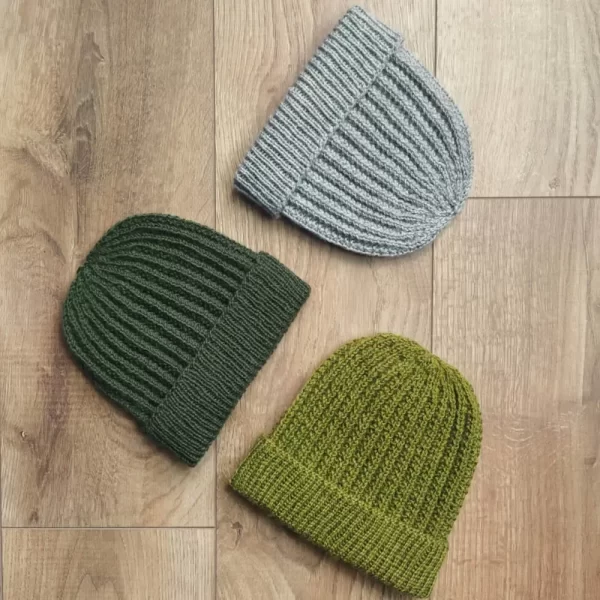
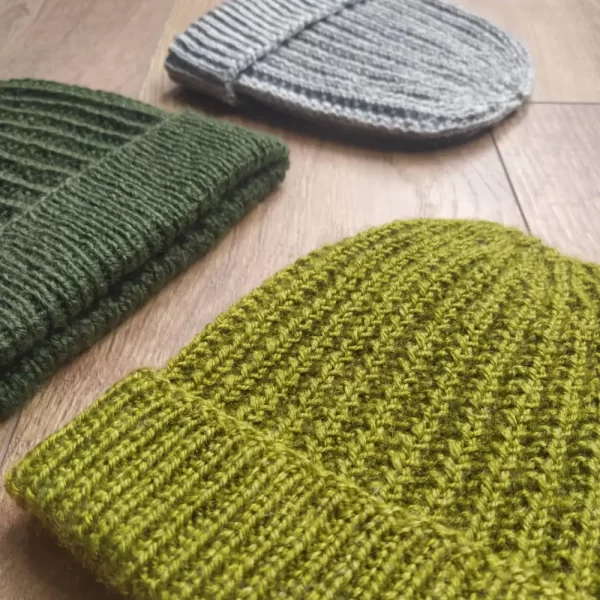
The One More Mistake beanie is a textured twist on the classic ribbed beanie. The deep ridges created by the Mistake Rib stitch provide extra stretch and warmth.
I’m not going to pretend I’ve created anything mind blowing here. It’s a simple beanie made with a mistake rib stitch body, which has already been published by dozens of other knitwear designers.
However, when searching for a pattern to use, I couldn’t quite find one with the yarn weight and head measurements that I needed. So, I knit these hats by sight and wrote my own pattern.
Enjoy!
What you’ll need:
- 2 skeins of Katia’s Promo Fin yarn
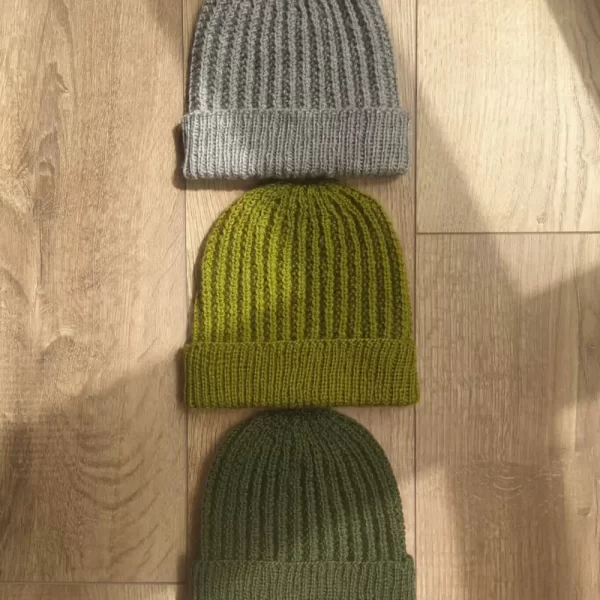
- Colors shown are 846 (Medium Beige), 587 (Pistachio), and 612 (Medium Green)
- Size 3.5mm circular knitting needles (40cm long)
- Size 3.5mm DPNs
- Darning needle for weaving in ends
Abbreviations:
- CO: Cast on (we used the classic long-tail cast on)
- k: knit
- p: purl
- p2tog: purl the next two stitches together (1 stitch decreased)
- k2tog: knit the next two stitches together (1 stitch decreased)
- ssk: slip 1 stitch knitwise, slip the next stitch purlwise, then knit those two stitches together from the righthand needle.
Gauge:
- 24 stitches = 10cm in Mistake Rib stitch on 3.5mm needles.
- Note: we measured our gauge while comfortably stretching the stitches, as they would be stretched while worn.
Sizes:
- This hat will fit the average adult head (approximately 54cm around, with a few centimeters of stretch).
- If you’d like to size up or down, you can adjust the number of stitches in increments of 16. This will allow you to follow the decrease section without making any additional adjustments.
- Keep in mind this hat will stretch a bit when blocked, so don’t worry if it seems a tad small while knitting.
What you’ll need:
- 2 skeins of Katia’s Promo Fin yarn
- Colors shown are 846 (Medium Beige), 587 (Pistachio), and 612 (Medium Green)
- US Size 4 circular knitting needles (16in long)
- US Size 4 DPNs
- Darning needle for weaving in ends
Abbreviations:
- CO: Cast on (we used the classic long-tail cast on)
- k: knit
- p: purl
- p2tog: purl the next two stitches together (1 stitch decreased)
- k2tog: knit the next two stitches together (1 stitch decreased)
- ssk: slip 1 stitch knitwise, slip the next stitch purlwise, then knit those two stitches together from the righthand needle.
Gauge:
- 24 stitches = 4 inches in Mistake Rib stitch on US Size 4 needles.
- Note: we measured our gauge while comfortably stretching the stitches, as they would be stretched while worn.
Size:
- This hat will fit the average adult head (approximately 21 inches around, with a couple inches of stretch).
- If you’d like to size up or down, you can adjust the number of stitches in increments of 16. This will allow you to follow the decrease section without making any additional adjustments.
- Keep in mind this hat will stretch a bit when blocked, so don’t worry if it seems a tad small while knitting.
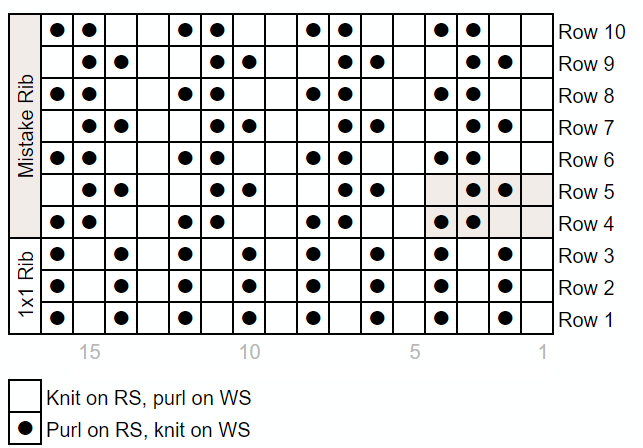
Chart:

Instructions
Knitting the brim & body
Cast on 128 stitches and join into a round, taking care not to twist the stitches when joining.
Work in 1×1 rib for 5.5cm (approximately 2¼ inches), then continue to the mistake rib rounds.
Mistake rib round 1: *k2, p2, repeat from * to end of round.
Mistake rib round 2: k1, *p2, k2, repeat from * to last stitch, k1
Repeat mistake rib rounds 1 & 2 until body of hat, not including the brim, reaches 14cm (approximately 5½ inches), then continue to the crown.
Knitting the crown
The following rows have progressive decreases that will close the crown of the hat. If you’re using circular knitting needles, you’ll eventually need to switch to DPNs when the stitches get too tight.
Round 1: *k2, p2, k2, p2tog, repeat from * to end of round.
Round 2: k1, *p2, k2, p1, k2, repeat from * to last 6 stitches, p2, k2, p1, k1.
Round 3: *k2, p2, k1, p2tog, repeat from * to end of round.
Round 4: k1, *p2, k4, repeat from * to the last 5 stitches, p2, k3.
Round 5: *K2, p2tog, k1, p1, repeat from * to end of row.
Round 6: k1, *p1, k4, repeat from * to last 4 stitches, p1, k3.
Round 7: *k1, p2tog, k1, p1, repeat from * to end of round.
Round 8: knit every stitch.
Round 9: *k1, k2tog, p1, repeat from * to end of round.
Round 10: knit every stitch.
Round 11: *k2tog, p1, repeat from * to end of round.
Round 12: knit every stitch.
Round 13: ssk to end of row.
Round 14: k2tog to end of row.
Cut a long tail and weave through remaining stitches, then pull tight to cinch the hat closed.
Finishing
Block your hat and then weave in any loose ends to finish.
Enjoy!
Want FREE knitting patterns?
Subscribers get FREE access to newly-released patterns.


I read that you can increase the stitches in increments of 16, roughly how much will this add on to the final product? Thank you!
Hi Niamh,
Increasing by 16 stitches would add approximately 7cm or 2.5in lightly stretched.
Keep in mind the mistake rib stitch is already quite stretchy, so the standard size will fit most adult heads.
Hope that helps!
What is the chart included in this pattern for? Cannot find any reference to it ???
Thank you
Hi Marisa,
The chart is just a visual representation of the stitch pattern used in the hat. Some knitters (myself included) find it easier to understand knitting instructions when a chart is provided. If you don’t need it, no worries. You can absolutely knit this hat just following the written instructions.
Thank you so much this looks just what I wanted. I’m going to start the hat today
Can you tell us what weight the yarn you used is if we want to substitute?
Hi Cassandra,
The yarn used in this pattern is a fine yarn (weight category 2). The exact weight is 50g / 170m or 1¾oz / 190yd.
Most sport or baby weight yarns will work with this pattern, as long as you can match the gauge.
Can this be knitted on straight needles? If so, what size?
Thank you Jacqui
Hi Jacqui,
This hat can be knit on straight needles, but the crown might get a little tricky. Here’s what I would do:
It could be a fun challenge. Let me know how it goes!
Can this hat be knitted using size 8 circular needles with two strands of yarn together? If so, how many stitches should I cast on?
Hi Linda,
Going from a single strand on Size 4 needles to double strand on Size 8 needles would require some significant adjustments to the pattern. I don’t think this pattern is a good fit, but there are tons of other mistake rib beanie patterns on Ravelry and other knitting websites.
I recommend knitting a swatch with your available yarn/needles and using Ravelry’s advanced search to find a pattern that matches your gauge.