
How to knit basic cables
A little extra guidance for knitters new to cables
Learning to knit cables may seem like a daunting task for new knitters. Thankfully, it’s not as complicated as it looks! If you have a solid knitting foundation, meaning you know your knit and purl stitches, you can definitely learn how to knit basic cables.
Disclaimer: This post may contain affiliate links. If you click one, we may receive a small commission at no cost to you. Thank you.
Contents:
Overview
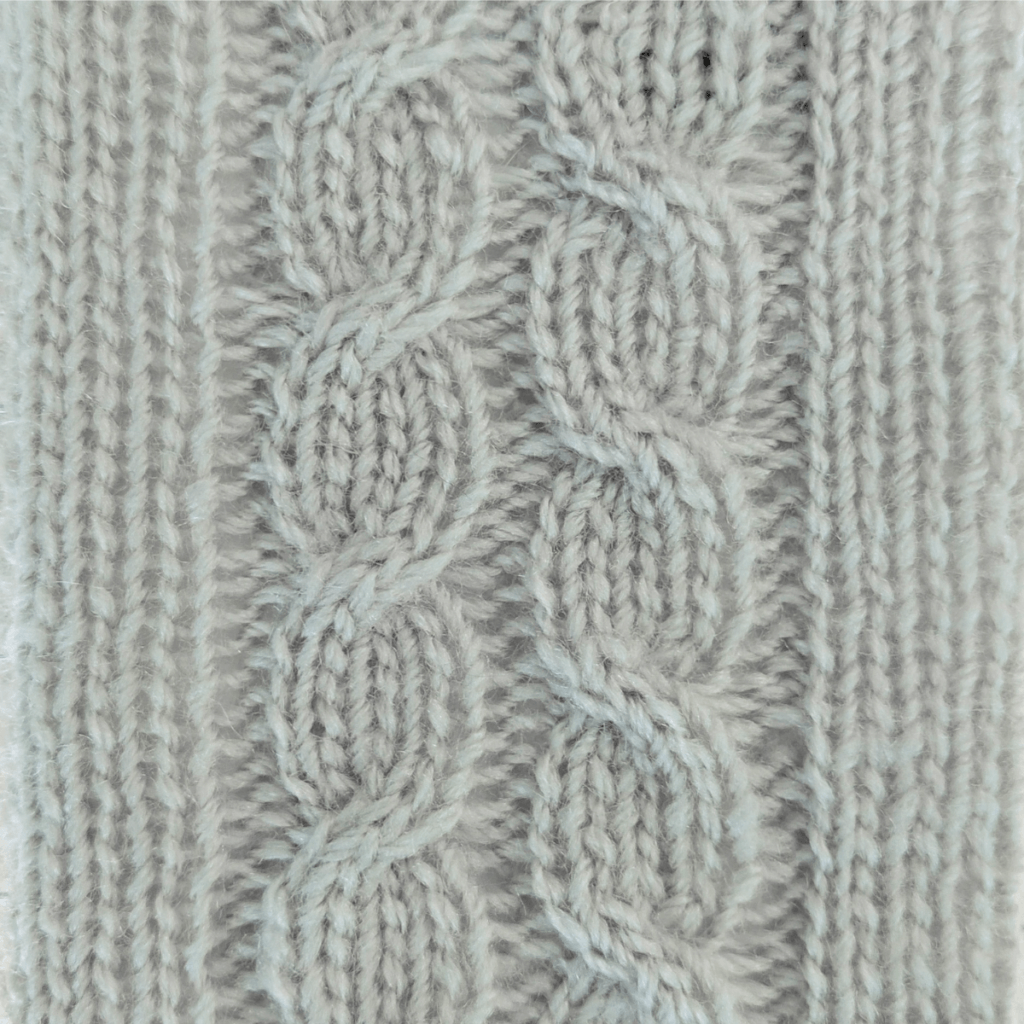
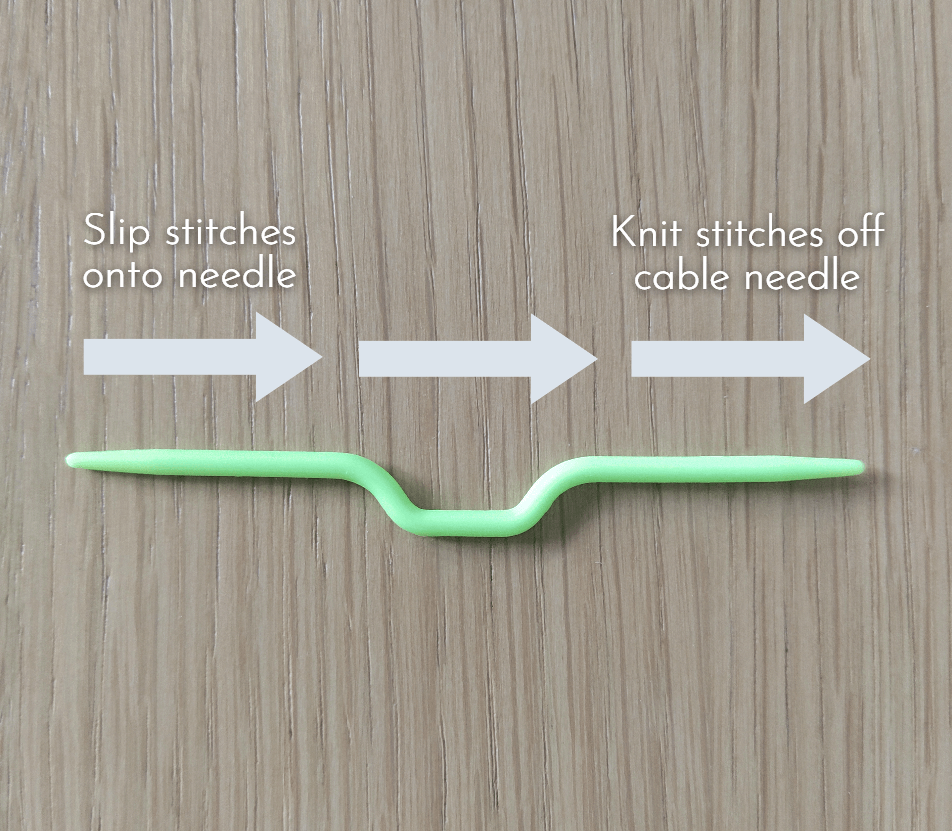
Cable stitches are just columns of stockinette stitch with which we create a little twist. How do we do this? By using a cable needle to rearrange the stitches.
What you’ll need:
- Yarn
- Knitting needles corresponding to the weight of your yarn
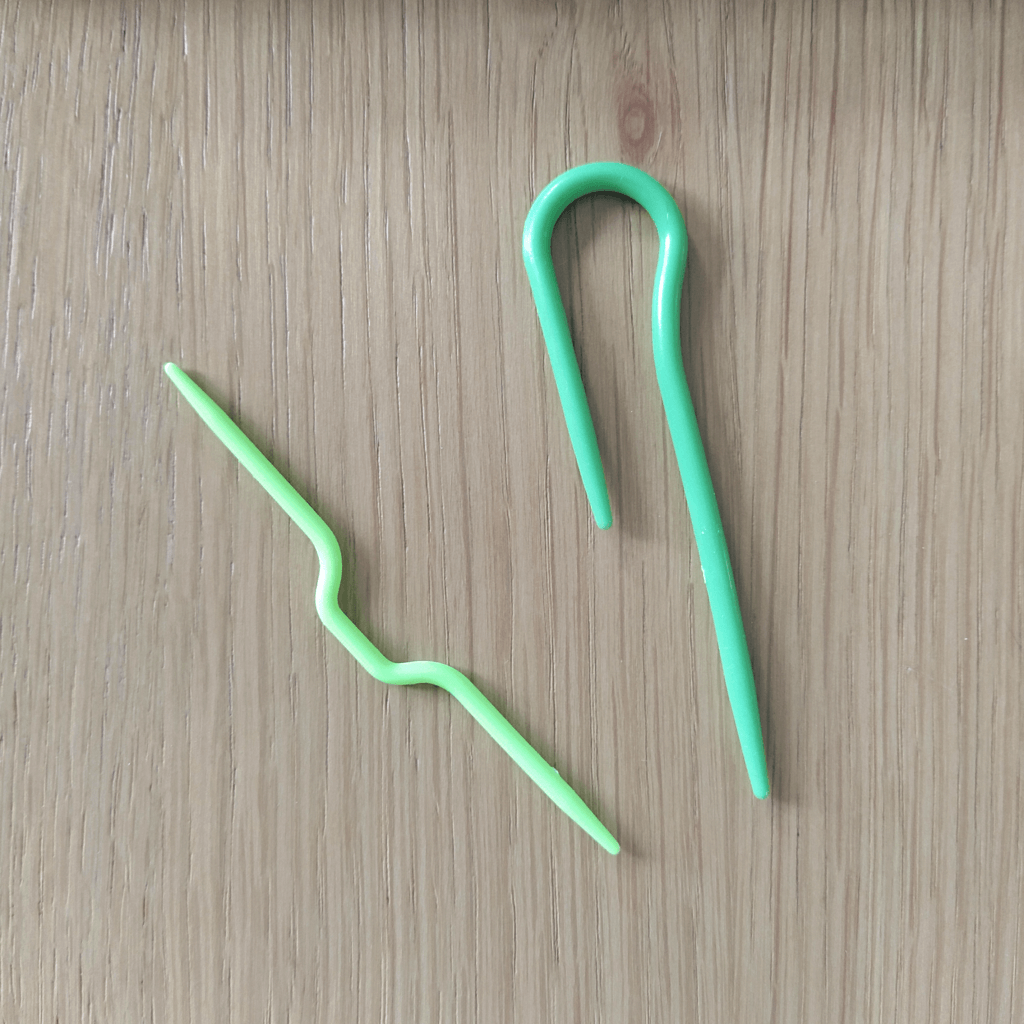
- A cable needle
Cable needles come in a variety of sizes and shapes. The size of the needle should be similar to the size of the needles you’re knitting with, but a small size differences won’t ruin your project.
The shape of the cable needle doesn’t make much of a difference either, but you’ll surely develop a preference for a certain style. We recommend buying a starter pack that has a few different shapes and sizes.
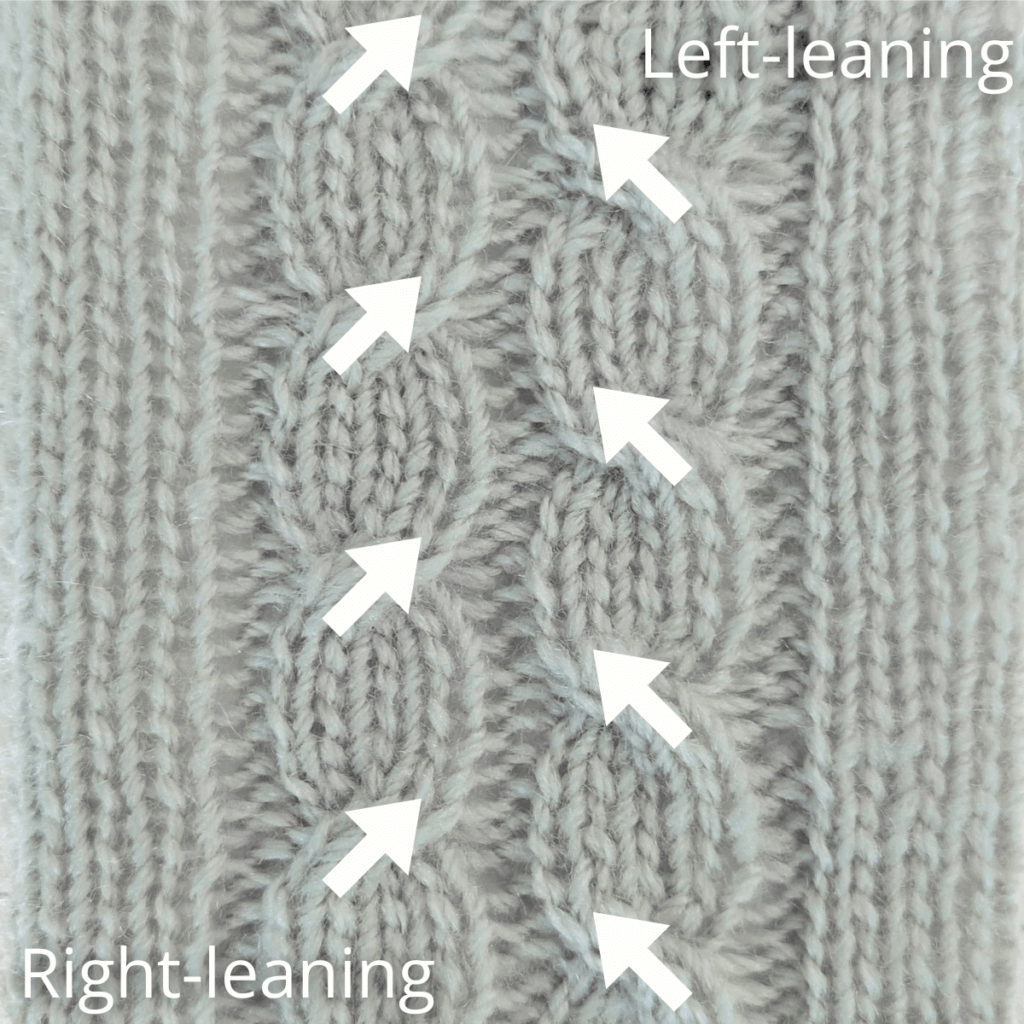
C2F (Left-leaning cable)
Let’s start with how to knit C2F, or how to knit left-leaning cables. If a pattern features left-leaning cables, you’ll likely see it explained as follows:
C2B: slip 2 stitches onto cable needle and hold in front of work. Knit the following two stitches, then knit the two stitches off the cable needle (taking care not to twist the stitches).
Essentially, you’re pulling two stitches across the front of your project and securing them into place by knitting. Here’s what that looks like:
C2B (Right-leaning cable)
Knitting the C2B stitch is the exact opposite of C2F. Instead of holding the slipped stitches in front of your work, you’ll be holding them behind your work to create a right-leaning twist.
C2B: slip 2 stitches onto cable needle and hold behind your work. Knit the following two stitches, then knit the two stitches off the cable needle (taking care not to twist the stitches).
Here’s what C2B looks like in action:
Tips & Tricks
Don’t twist your stitches
When using a cable needle, be careful not to twist your stitches. This means you should pick up stitches with one end of the cable needle, and knit the stitches off the opposite end.
Watch your tension
Cables tend to be tighter than simple stitches such as stockinette. When following a pattern with cables, we highly recommend knitting a swatch to make sure your gauge is spot on.
Choose your yarn wisely
Your choice of yarn will have a huge impact on the final appearance of your cable stitches. Cables tend to look best when made with simple yarns with strong stitch definition. As a rule of thumb when knitting cables, we recommend avoiding two-tone yarns, overly-glittery yarns, or very fuzzy mohair.
If you’d like to learn more about choosing the perfect yarn, check out this article.
Mix it up
Now that you know how to knit basic cables, we encourage you to test your skills. By alternating and combining c2f and c2b cables, you can create an infinite number of unique patterns.
If you’re ready to try out your cabling skills, how about knitting the Valentine Headband? It’s free!
Want FREE knitting patterns?
Subscribers get FREE access to newly-released patterns.
One Comment